Framework element: Cross Section
The data, or technical content, that is displayed on the canvas in the CoView is visible either on a 'map' or on a 'cross section'. The cross section is a framework element that must be added to the canvas before you can start selecting data to visualize on it. You can add a cross section element either via the toolbar of the CoView, see image below, or via the context menu that opens with a right mouse button click anywhere on the canvas (not on an element).
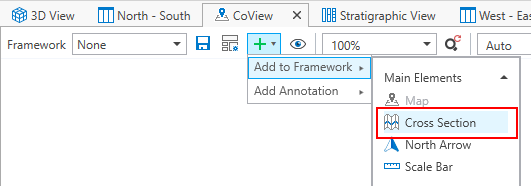
Use the Add to Framework > Main Elements > Cross Section option in the toolbar of the CoView to add a cross section to the canvas. click to enlarge
After adding the cross section framework element to the canvas, it is only a placeholder. To make a cross section visible in the cross section element, that cross section must be displayed on the map first. Next, you have to use the CoView Manager.
Visualizing a cross section in the CoView
- Go to the Framework tab in the CoView Manager. Here, all the elements that you have added to the canvas are listed in the Selection section. Select the cross section element (it will be highlighted in blue). The Display section updates, and all the settings related to cross section framework elements are listed.
- At the top of the Display section, there is a cross section drop-down list. All the cross sections that are already selected for display on the map are listed here. Select the cross section that you want to visualize. If you want, you can type in a name in the 'Title' entry field. This name will be appended to the Cross Section element listed in the Framework tab.
- The cross section element in the CoView is updated accordingly. The pane lines of the selected cross section are shown to begin with. To show data on the cross section, go to the Content tab of the CoView Manager.
- In the Selection section, under the cross section that you have selected for display, all the objects that you can visualize on that cross section are listed. From here, select all the objects that you want to show on the cross section. The cross section is updated immediately.
- For objects that you display on the cross section, you can change the display settings in the Display section of the CoView Manager. To do so, make sure the object is selected in the Selection section (it is highlighted in blue) and uncheck the Default settings option in the Display settings section. To save time in setting up the display settings, you can create and apply templates.

Select a cross section for display. click to enlarge
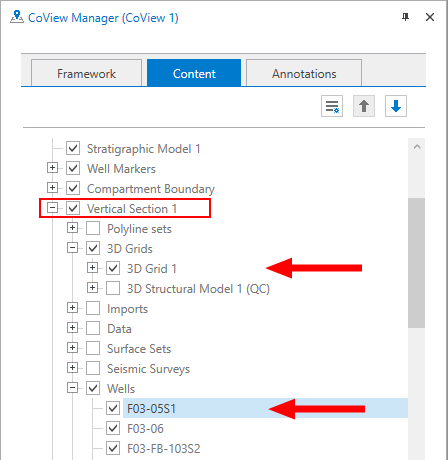
Select any object that is listed under the cross section to display it in the Cross Section element. click to enlarge
Creating and editing a cross section in the CoView
Apart from visualizing an existing cross section in the CoView, you can also create a new cross section on a map. You do that with the Editing Tools, opened via Workspace > Tools > Editing Tools.